+86 18578756148


Choosing the right Vibrating Compactor Rammer in 2026 requires more than comparing engine power and price. Ground conditions, trench width, soil moisture, and daily workload all affect performance. A machine that excels on dry granular soil may struggle in damp clay. That difference matters.
This guide examines the practical details professionals use on real job sites. We will consider operating weight, compaction force, vibration frequency, plate size, fuel efficiency, and handle design. Maintenance access also deserves attention. A clogged air filter or loose fastener can reduce productivity before the machine appears damaged. Small details matter.
Operator experience remains valuable, but it is not enough alone. Reliable decisions should combine manufacturer specifications, independent testing, warranty terms, and feedback from trained users. Safety features, noise levels, and transport requirements will also influence the final choice. A compact rammer may fit a narrow trench perfectly, yet its controls could feel tiring after several hours. No machine is perfect.
Some buying assumptions deserve challenge. Maximum impact force does not automatically mean better results. More power can increase fatigue, fuel use, or surface damage on unsuitable materials. The best Vibrating Compactor Rammer should match the application, not simply dominate a specification sheet. This 2026 guide offers a balanced framework for comparing models, identifying trade-offs, and avoiding expensive decisions based on incomplete information. Field conditions change. Good judgment must change with them.
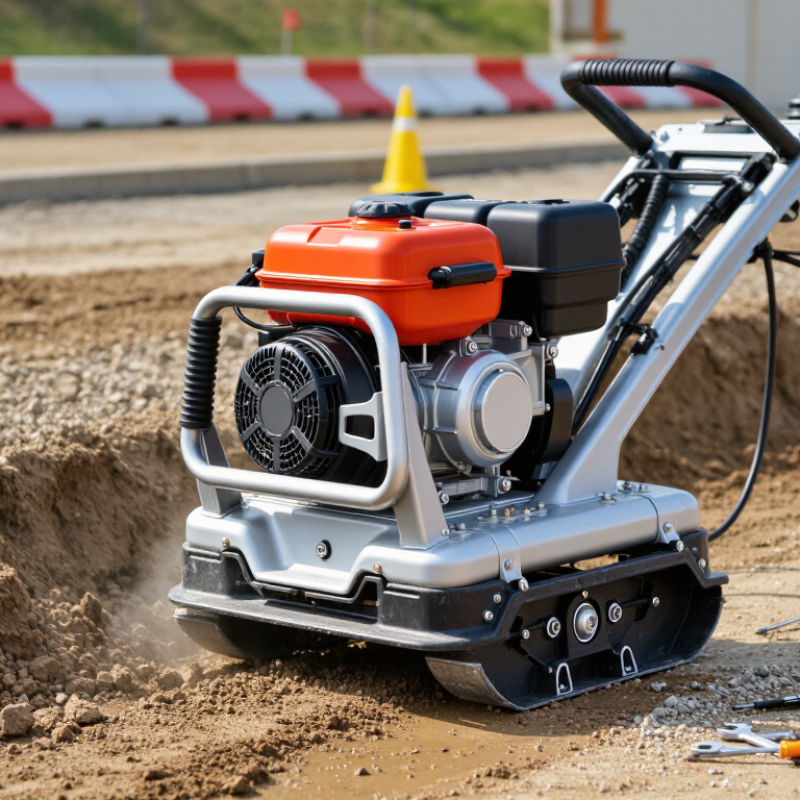
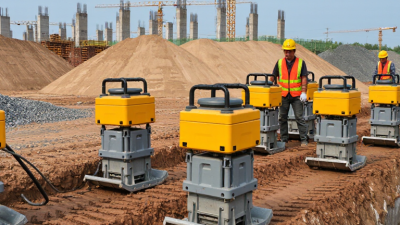
A vibrating compactor rammer is a narrow, walk-behind machine that densifies soil through repeated vertical impacts. Its steel shoe moves rapidly up and down, pressing loose particles closer together. Unlike a flat plate compactor, it concentrates force in a smaller area. That design helps it reach trenches, edges, and confined spaces. The operator controls direction and speed from behind the handle. It is simple, but not effortless.
Inside the housing, an engine drives an eccentric weight or vibration assembly. As the weight rotates, it creates an uneven force. The shoe then delivers thousands of compacting impacts per minute. Cohesive soil, clay, and mixed backfill often respond well to this action. Performance still depends on moisture, layer thickness, and operator technique. In practical site checks, uneven passes can leave soft pockets beneath a seemingly firm surface. No specification tells the whole story. I would check vibration frequency, impact force, shoe size, balance, controls, and service access before choosing. Noise, hand-arm vibration, and lifting demands also deserve honest attention.
Tips: Test the rammer on similar soil before purchase. Watch the shoe during operation. Excessive bouncing may indicate poor control or unsuitable moisture. Keep each lift within the recommended thickness, and record pass counts. A lower-priced machine may seem attractive, but difficult maintenance can cost more later. I still double-check manufacturer data against real site conditions. That step is easy to skip.
Choosing the right vibrating compactor rammer starts with the soil beneath the machine. Rammers work best on cohesive soils, including clay, silty clay, and damp mixed fill. Their narrow foot delivers strong vertical impact, helping press particles together in confined areas. The material should hold slight moisture, not release water when squeezed.
Granular soils can also benefit, especially in narrow trenches and repair zones. However, loose sand and clean gravel often respond better to a vibrating plate compactor. I have seen operators use a rammer on very dry sand, expecting quick results. The machine bounced sharply, but the ground remained loose. That was an expensive lesson.
Rammers suit utility trenches, foundation edges, drainage lines, and small sidewalk repairs. They are useful around posts, walls, and other spaces where wider equipment cannot turn. Compact the backfill in thin layers, usually according to the soil and project specification. Thick lifts may look finished on top while staying weak underneath. Watch the machine’s movement. If it jumps excessively, check moisture, layer thickness, and soil type before continuing. A rammer is powerful, but it is not magic.
| Soil Type or Material | Why a Rammer Works | Typical Construction Tasks | Recommended Operating Range | Moisture Condition | Important Limitations |
|---|---|---|---|---|---|
| Clay and cohesive soil | The percussive impact helps knead and rearrange particles in soils that do not compact efficiently under vibration alone. | Trench backfill, utility repairs, foundations, footings, drainage works, and confined earthwork. | Use a light or medium rammer for lifts of approximately 100–200 mm, depending on soil and machine capacity. | Slightly moist and close to the material’s optimum moisture content; overly wet clay may deform instead of compacting. | Avoid compacting saturated or highly plastic soil. Confirm density with the project specification or field testing. |
| Silty soil | Impact action can improve density in narrow areas, but silts are sensitive to water and can lose stability when overworked. | Pipe trenches, small excavations, landscape structures, and localized backfill. | Use thin lifts, generally about 100–150 mm, with controlled passes and frequent surface checks. | Keep the material damp but not wet. Stop if pumping, rutting, or surface shearing appears. | A rammer is not a substitute for drainage correction or removal of unstable wet soil. |
| Mixed soil and gravelly fill | The narrow foot and impact force provide good control around obstructions and in variable backfill. | General trench backfill, retaining-wall zones, culvert approaches, and repair work. | Select a medium-duty unit for lifts of approximately 150–200 mm; reduce lift thickness if the fill contains large particles. | Moisture should be reasonably uniform throughout each lift. | Large stones can reduce contact with the foot and cause uneven compaction or machine bounce. |
| Sand and granular soil | A rammer can compact small confined areas, although a vibratory plate is often more efficient on open granular surfaces. | Narrow trenches, corners, small patches, and areas inaccessible to a plate compactor. | Use thin lifts, commonly about 100–150 mm, and choose a plate compactor for larger open areas where practical. | Slight moisture may improve density, but excess water can cause instability or migration of fine particles. | A rammer may be slower and less uniform than a plate on broad, clean granular surfaces. |
| Crushed aggregate and road base | Impact can seat aggregate in confined spaces, especially beside structures and inside narrow excavations. | Paver edges, utility trenches, small repairs, and areas beside curbs or walls. | Use 100–150 mm lifts unless the equipment manufacturer and project specification permit more. | Use material moisture recommended by the specification; avoid excessive water that can wash fines away. | For wide pavement bases, a reversible plate or roller generally provides higher productivity. |
| Asphalt patch edges and repairs | The compact foot offers precise control in small repair zones and near road edges. | Small asphalt patches, utility-cut repairs, shoulder work, and edge restoration. | Use only equipment approved for the asphalt mix and repair method; work in controlled, thin layers. | Compact within the mix’s suitable temperature window and follow the paving specification. | Not recommended for large asphalt areas; an asphalt roller or suitable plate is normally more consistent. |
| Backfill around utilities | The narrow base fits trenches and allows targeted compaction around pipes, ducts, and service connections. | Water lines, sewer lines, electrical conduits, telecommunications, and gas-service trenches. | Use thin lifts, commonly 100–150 mm near utilities, and maintain the required clearance from the pipe or duct. | Condition the backfill evenly and prevent free water from accumulating in the trench. | Avoid direct contact with exposed pipes, fittings, or shallow services unless the installation specification allows it. |
| Areas with restricted access | Compact dimensions and forward-moving impact action allow work in trenches, corners, and spaces too narrow for larger machines. | Basement edges, foundation walls, narrow walkways, landscaping, and repair zones. | Choose a machine whose operating width, mass, and travel speed match the available space and operator control needs. | Prepare and condition each lift before compaction; confined space does not eliminate moisture requirements. | Provide ventilation for fuel-powered equipment and maintain safe clearance from walls, workers, and underground services. |
Choosing a vibrating compactor rammer starts with soil, not horsepower. The FHWA Soils and Foundations Reference Manual explains that moisture, gradation, and compactive effort control final density. A powerful engine cannot rescue poorly chosen moisture.
Compare impact force carefully. Higher force usually helps dense gravel, but it can overwork thin lifts or disturb fragile edges. FHWA guidance commonly recommends matching lift thickness to the machine’s effective energy, often around 100–200 millimeters for small trench work. Treat that range as a field starting point, not a guarantee.
Plate size changes productivity and control. A wider plate covers more ground, while a narrow plate reaches corners and utility trenches. Weight affects pressure, transport, and operator fatigue. The U.S. Bureau of Labor Statistics reported that construction and extraction occupations had a 2023 fatal-work-injury rate of 10.8 per 100,000 full-time workers, so handling effort deserves serious attention. Check vibration exposure data against ISO 5349 guidance, especially during repeated passes. Shorter sessions help.
Power figures can mislead. Two rammers may list similar engine output but deliver different impact frequencies and forces. Ask for measured impact force, operating weight, plate dimensions, and frequency. Then compare output per pass. I would not choose the heaviest unit automatically. On a narrow trench, it may bounce, slow production, and create uneven density. A smaller machine can sometimes perform better, although that conclusion needs field testing. Record pass counts and surface response. Guesswork remains expensive.
Compare representative rammer classes by engine power, shoe plate size, operating weight, and impact force. The figures below are typical midpoints for light-duty, general-purpose, and heavy-duty equipment categories rather than specifications from any particular brand.
Selection guide: Higher impact force and engine power can improve compaction productivity, while a larger plate covers more area per pass. Greater operating weight may increase stability and penetration but can reduce maneuverability on narrow or sensitive surfaces.
Choosing a vibrating compactor rammer starts with exposure control, not engine power. The UK Health and Safety Executive sets 2.5 m/s² A(8) as the hand-arm vibration action value and 5.0 m/s² as the limit. Ask for measured vibration data under realistic soil conditions. Laboratory figures can look reassuring. Wet clay may tell a different story.
Comfort affects control during long trench work. Choose a balanced handle, low hand pressure, and effective vibration isolation. A cushioned grip helps, but it cannot correct poor machine balance. Check noise levels, handle height, and recoil starting effort before purchase. The U.S. Bureau of Labor Statistics recorded 1,075 fatal construction workplace injuries in 2023. That figure covers many hazards, yet it shows why fatigue and control deserve serious attention. Small details matter.
Maintenance features should be visible and reachable. Useful choices include an hour meter, simple oil inspection, protected belt drives, sealed bearings, and an accessible air filter. A clear daily-check chart can prevent skipped inspections. HSE guidance also recommends recording vibration exposure and maintaining equipment properly. In practice, operators sometimes ignore these records when schedules tighten. That is a weakness. A rammer with fewer service points may save minutes, but neglected filters and loose fasteners can quickly reduce performance. Verify service intervals in the manual, and confirm that replacement parts and technical support are available locally.
Your budget should follow the ground, not the brochure. Start by identifying the soil, trench width, lift thickness, and daily operating hours. The Federal Highway Administration’s Soils and Foundations Reference Manual highlights soil type, moisture content, and lift thickness as key compaction variables. A narrow trench may need a slim shoe and precise handling. A larger fill area may justify higher centrifugal force, but extra power can damage weak soil.
Cost includes more than the purchase price. Compare fuel or electricity use, service intervals, spare parts, transport, and operator fatigue. The European Agency for Safety and Health at Work references vibration exposure concerns, while EU Directive 2002/44/EC sets an action value of 2.5 m/s² and a limit value of 5 m/s² for daily hand-arm vibration exposure. Check the machine’s vibration data carefully. It may not reflect every soil condition.
Experience also changes the calculation. A heavier rammer can compact faster, yet it may be awkward beside walls or utilities. Rental can protect a limited budget when the project is occasional. Ownership may make sense for repeated trench work. Measure the real work cycle. My first estimate is often too optimistic. Leave room for wet soil, pauses, and maintenance. A cheaper machine is not cheaper if it causes rework.