How to Use a Breaking Hammer Effectively for DIY Projects?
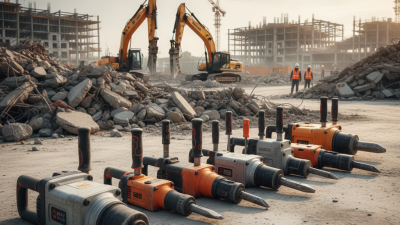
When tackling DIY projects, many tools come to mind. One such tool is the Breaking Hammer. This powerful implement is essential for demolition tasks. It crushes materials with force, making it useful for breaking concrete or brick.
Using a Breaking Hammer effectively requires practice. It's not simply about swinging the hammer. Proper stance and grip are crucial. Ensure you stand steady and hold the hammer firmly. This helps to exert more power with each strike. Mistakes can happen. Sometimes, angles may be off, or swings might miss the target. Learning from these missteps is part of improving your technique.
With every project, the Breaking Hammer reveals its strengths and weaknesses. Observing its efficiency can teach valuable lessons. Take your time. Focus on the task at hand to maximize results. Understanding how to control the tool transforms your capabilities. Embrace the learning process while working with a Breaking Hammer.

Understanding the Types of Breaking Hammers for DIY Projects
When it comes to DIY projects, choosing the right breaking hammer is crucial. There are primarily two types: the jackhammer and the sledgehammer. Each serves a purpose, but they differ significantly in use and effectiveness. A jackhammer is great for breaking concrete but requires skill to handle. Its weight can be daunting, but once you master it, the results are impressive.
On the other hand, a sledgehammer is more accessible for beginners. It’s powerful and doesn’t require electricity. You can swing it to break bricks or tiles with little effort. However, lack of control can lead to accidents. Remember, safety should always come first. A proper grip and stance can prevent injuries.
Using a breaking hammer means working with force. You might find yourself missing your target or hitting with too much strength. Learn from these experiences. Perhaps start with smaller tasks to build your confidence. Each attempt is a step toward mastering your technique.
How to Use a Breaking Hammer Effectively for DIY Projects?
| Type of Breaking Hammer |
Weight (lbs) |
Best Use Cases |
Material |
Price Range ($) |
| Claw Hammer |
16 |
Nailing and Removing Nails |
Steel |
10-20 |
| Sledgehammer |
20 |
Breaking Concrete and Demolition |
Steel |
30-70 |
| Mallet |
3 |
Driving Chisels and Tapping |
Rubber or Wood |
5-15 |
| Pick Hammer |
5 |
Breaking Rock and Hard Material |
Steel |
15-30 |
| Demolition Hammer |
15 |
Heavy-Duty Demolition Projects |
Electric with Steel Bits |
100-300 |
Essential Safety Precautions When Using a Breaking Hammer
Using a breaking hammer can be effective for many DIY projects. However, safety should always come first. According to the Occupational Safety and Health Administration (OSHA), improper use of tools can lead to serious injuries. In fact, nearly 200,000 people are treated annually for tool-related injuries. It’s essential to prioritize safety before starting any work.
Always wear the right personal protective equipment (PPE). This includes safety goggles, gloves, and sturdy boots. Ensure your work area is clear of clutter. Loose debris can cause trip hazards. Additionally, maintain a firm grip on the hammer. A sudden slip can lead to accidents. Be mindful of your surroundings, especially if others are nearby.
Tip: Examine the breaking hammer before use. Check for any damage or wear. A faulty tool can compromise your safety.
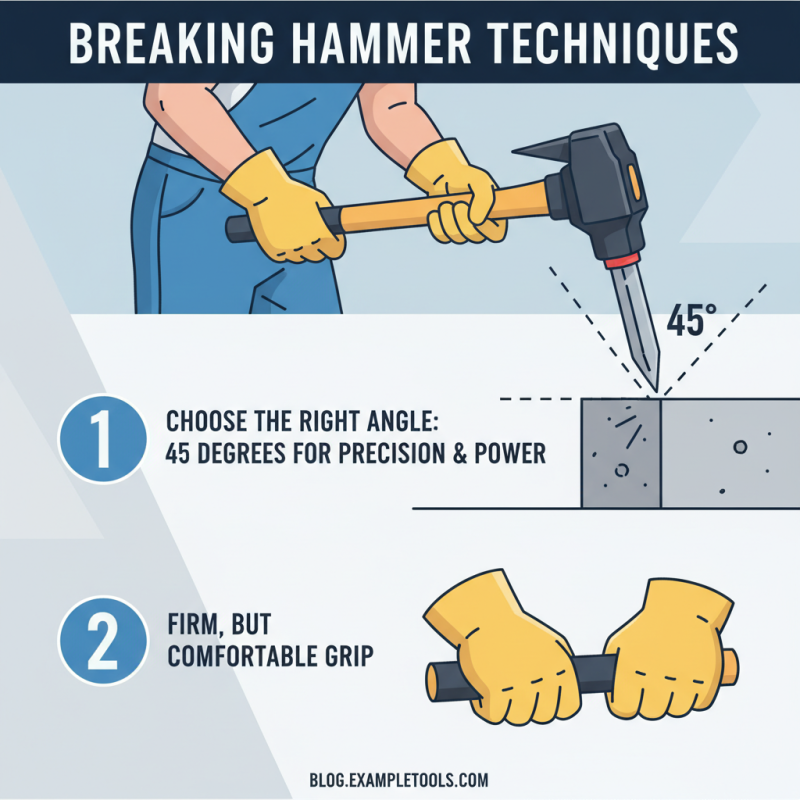
Proper technique is equally important. Hold the hammer using both hands for better control. Position yourself in a stable stance, so you won’t lose balance. Never crow the breaking hammer. This usually leads to errors and potential harm. Furthermore, if you're striking concrete, aim for a consistent angle to enhance effectiveness.
Tip: Practice on a scrap material first. This helps gain confidence without risking injury.
Creating a safe and efficient workspace is a choice. Always reflect on your work habits. Are they helping or hindering your progress? Prioritizing safety and technique can make a significant difference in your DIY projects.
Common DIY Projects that Benefit from a Breaking Hammer
A breaking hammer can be a vital tool for various DIY projects, especially those that involve demolition. For instance, when renovating a home, you may need to remove old tiles or concrete sections. According to a study by Home Remodeling Institute, over 60% of homeowners tackle such tasks themselves, often leading to mixed results. Using the right technique with a breaking hammer can ease the process and improve outcomes.
In garden projects, a breaking hammer is useful for removing stubborn roots or old pathways. The tool efficiently breaks apart hard materials, allowing for easier excavation. A survey by DIY Network noted that 45% of yard enthusiasts prefer using a breaking hammer for such projects. However, it’s challenging to control the tool's energy, and improper use can lead to damage. Safety concerns arise when using it, as 25% of accidents occur when homeowners are inexperienced.
Additionally, small renovations that require wall demolition can greatly benefit from this tool. People often underestimate how a breaking hammer can efficiently handle brick or concrete walls. Having a clear plan and understanding basic safety measures is essential. Many DIYers have learned the hard way that rushing through can lead to injuries or property damage. Taking time to practice and understand the tool’s functionality is crucial for anyone serious about their DIY ambitions.
Common DIY Projects that Benefit from a Breaking Hammer
 +86 13794985240
 CONTACT NUMBER
 CONTACT NUMBER